Thursday, September 29, 2011

Canning Homemade Pumpkin Butter - Easy Breezy

Oh how I love fall! It's so beautiful and I grew up in the "holler" where we had the most beautiful falls because we were surrounded by trees! My childhood was pretty much a slice of heaven, I think. Where I grew up anyway. My family all lives on like a bunch of acres ( I don't want to put how many on here, because it might be a stupid guess but it's a lot). I grew up living next door to my grandparents and great uncles and aunts. I could walk to anyone's house and have someone that would feed me or talk to me or that I could annoy. :) I still go there all the time and take David there. I pray that David gets to experience how much fun the holler can be, climbing in the woods with cousins, going to visit family, coffee break, etc. My uncles and grandfather have coffee break every day at 3 at my late great grandmother's house. Anyway, fall reminds me of these kinds of things. That and the typical stuff: Yummy candles, football, chili, bonfires, weenie roasts, hayrides, pumpkins, Halloween, and my favorite October and then Thanksgiving. So I love to make stuff with pumpkin butter every fall. I first discovered pumpkin butter from Williams Sonoma. They sell their pecan pumpkin butter every year and it's very expensive. But nonetheless, sooooooo good that I bought some every year before decided, "Why can't I just try to make this myself?" I use it in recipes that call for pumpkin puree or to make Harvest Squares (don't make fun of me JT). I also serve it with pork tenderloin all year round. So, if you are every wondering what to do with it, those are some options! Also, I just made up this recipe so don't make fun of me if you make your own pumpkin butter. This works for me.

Here's what you are going to need:
 Pumpkins. I use pie pumpkins because they are way sweeter than jack o lanterns. But I think all pumpkins are edible.
 You will need a candy thermometer and a veggie peeler but NOT a veggie peeler like the red one shown above. That had to be tossed aside very quickly when I realized it wouldn't work on pumpkins.
 You will need a veggie peeler like this green one!
 Recap: Approx. 12 - 15 lbs of pumpkin, candy thermometer, a really sharp chef knife, and a veggie peeler that's not shaped like that red one.
 AND... a big huge pot.
 And jars that need to go in a dishwasher that has nothing else in it. That's how I roll with it anyway, you can just boil them and let them air dry.
 You'll need lids for the jars. We are going to boil the tar outta these.
 So, get to work. Peel those pumpkins girl!
 Lop off the sides.
 Scoop out those seeds. I used a melon baller, but any good ole spoon'll do ya! Save the seeds and candy them if you are ambitious. I'm not.
 Looks like this when you are done deseeding.
 Cut into arcs?
 Then cube.
 Then throw them into the pot.
 Add some apple juice or cider. I used juice because I didn't have cider and it's only organic because it's David's juice. Shhh, don't tell him. I used that whole bottle. I don't know, like 32 oz? I add another quart or more of water as it's cooking to continue to thin it down. I didn't take a pic of that, so you'll need to keep that in mind. Water is OK after you've initially flavored it with enough spices and juice and sugar.
 2 and a 1/2 cups of sugar. Yes ma'am!
 1/4 to 1/2 tsp of salt. Just a little ummph.
 Here we go, one very large tablespoon and a half or so of pumpkin pie spice. But we are not done. 
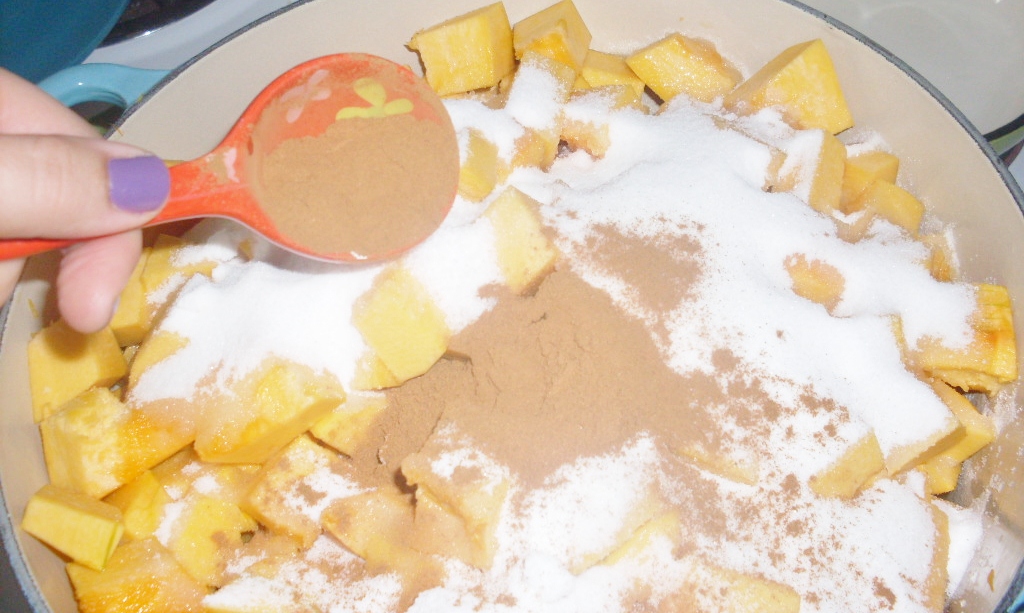
 1 very large, very heaping Tbsp of Cinnamon
 1/4 or 1/2 tsp of nutmeg because it's really strong and will take over.
 3 cinnamon sticks
 A very large splash of vanilla! Be liberal ladies.
 2 whole nutmegs
 A stick of butter or more if you are feelin' Paula Deanish. I didn't want too many milk products in it as I want it to keep as long as possible.
 Around Medium Low
 It looks like this. So COVER IT and cook it for HOURS! I think I cooked mine for 6 hours. Stirring occasionally. ALSO, I used a potato masher to break up the chunks. You could use an immersion blender but I didn't have one.
 Looks like this when you are done. So, when you are ready to can it, bring it up to 220 degrees on your candy thermometer. Be careful, I burned myself quite a bit. It bubbles and it is scalding!
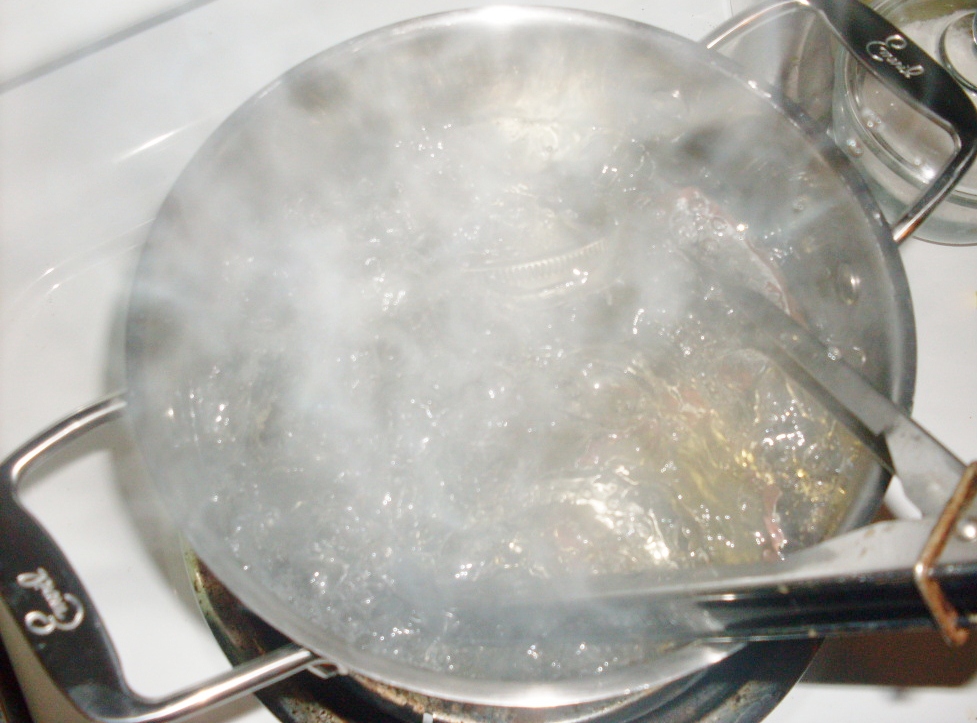
 Boil the tar outta your lids AND boil your tongs. Sanitize everything.
 Buy one of those nice funnels for canning and have it ready, OR use a plastic car funnel that's never been used. Either way... you'll prolly need a funnel. Remember that these jars have been cleaned and sanitized and air dried.
 Pour the pumpkin butter into the can.
 Use your sanitized tongs to place a sanitized lid onto the can. You don't have to screw a lid on immediately.
 After you've done all the jars, then you can screw the lids on. Which is what I did. Within an hour or so you should start to hear one of the best sounds ever: Click, Click! The cans will start to seal. All of mine sealed, but one and when I accidentally felt it to see it sealed. The thing to watch out for is if it seals and then pops back up. If it doesn't stay down you have bacteria. Also, canning sugary things isn't anywhere near as dangerous as canning veggies.
Tada! Here is a link to make my favorite fall dessert using your homemade pumpkin butter:
Pumpkin Harvest Squares

Refinished Sideboard Table/Foyer Table/Sofa Table?! I have no idea.

Last year my parents gave me this table for free. So I have no money in it. Isn't that the best? I don't know what kinda table this is, but I refinished it! Here are some pics! I know I've put all of them on facebook already, but I like to blog about my craft projects! So here we go!

 Before when the table was in my nonexistent foyer, but behind the couch!
 Then we rearranged the Living room and put it over by the fireplace. I love it there. Another Before picture!
 I woke up last Friday and decided that I was going to refinish it. I just decided. It was driving me crazy and fall always makes me want to be crafty for some reason. Here's the deal, I didn't want to spend any money on it though. I wanted to use materials I already had. So, I took paint from my house and mixed a green, with a white, and a little blue and got a cream. I was going for green, but oh well. Ha!
 I did have to spend $20 on a power sander, but I will use this baby. My next project is going to be refinishing my dining room table and chairs. :) So I didn't take pics of the process, but I sanded the tar out of the table. And then I painted it with my mixed paint.
 After one coat, I thought it was perfect! There will still flecks of the natural wood showing through and I didn't have to sand it and make it shabby chic at all, it just WAS!


 I knew I needed knobs, but I had a dilemma. I'd gotten by without putting any money in this piece and didn't want to put any more money in it. The knobs that came on it were old fashioned brass knobs, but I decided to spray paint them green with paint I already had. If i didn't like it, I could always go buy new ones. :)

 Turns out, I LOVE IT! They are so awesome! They POP!

 Then my mom and I decided it needed something above it but again I didn't want to spend any money on it. So I realized I had two mirrors I could spray paint with paint I already had! This is the result:


It makes my living room look SOOO cozy! I love it! :)